 Pin it
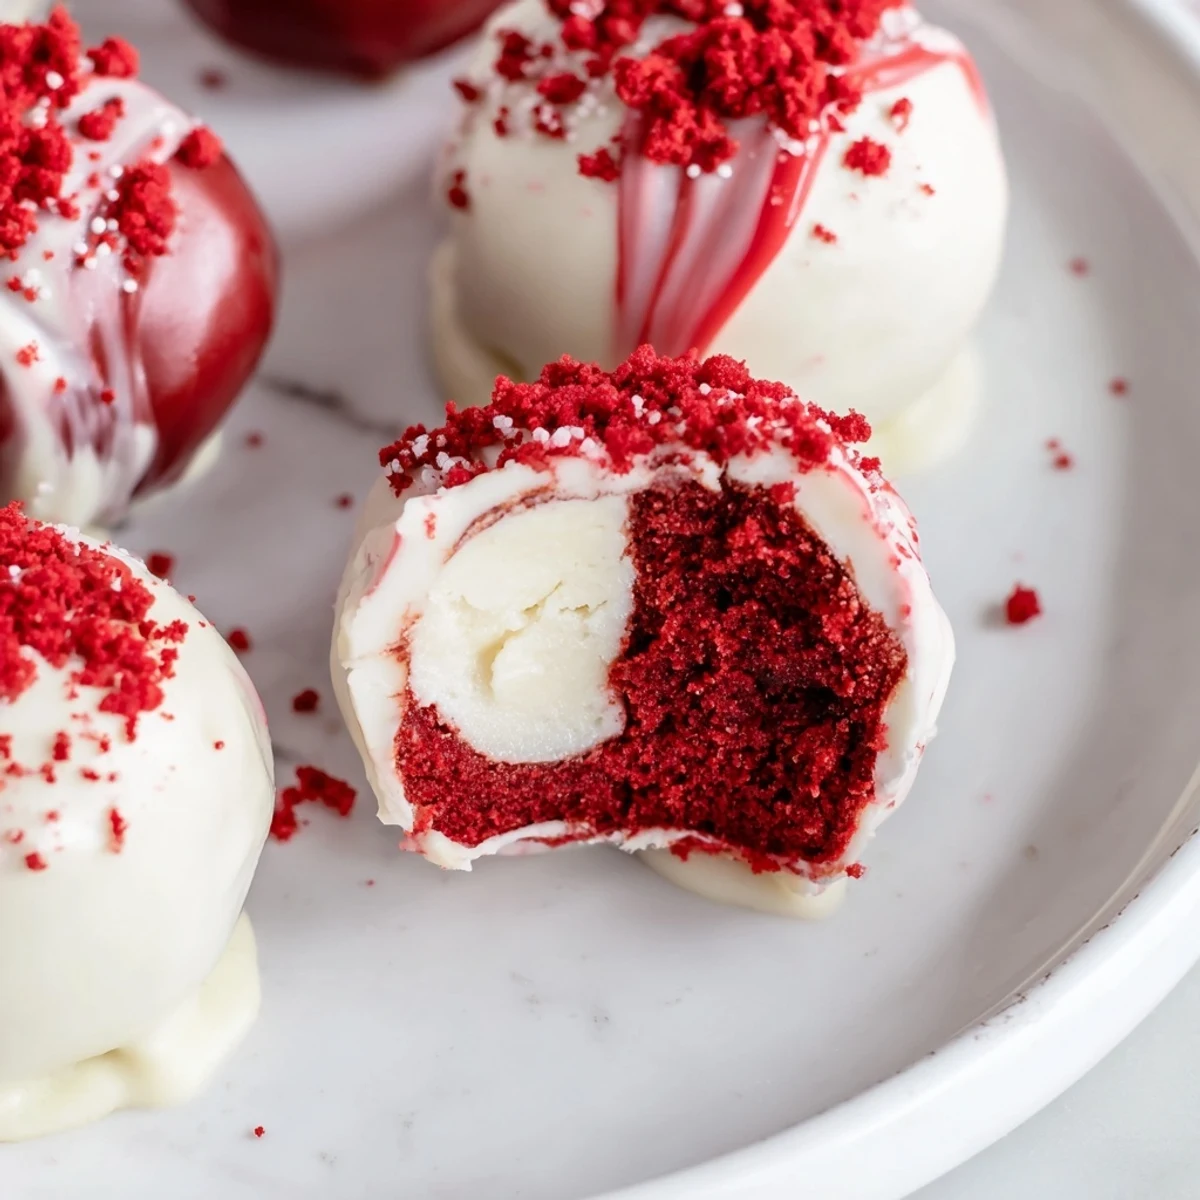
 Combine crumbled red velvet cake with a smooth cream cheese, powdered sugar and vanilla mixture, then roll into tablespoon-sized balls. Chill at least 1 hour to firm, dip in melted chocolate (add red coloring if desired) and decorate with crumbs or sprinkles. Makes 24 bites; prep ~30 minutes, total ~1.5 hours including chilling. Store chilled up to 5 days; try dark chocolate or add nuts for variation.
My kitchen counter looked like a crime scene the first time I made these, red crumbs everywhere, chocolate smeared on my forehead, and not a single ball that was actually round. But those lopsided little morsels disappeared in ten minutes flat at my neighbors potluck, and someone actually asked if I ordered them from a bakery. That messy afternoon turned into one of my most requested desserts, and honestly, I have never once managed to make them look as polished as they taste.
I brought a batch of these to my friend Ritas holiday party last December, setting them on the dessert table between store bought cookies and a fruit platter. Within twenty minutes the plate was empty except for a few scattered sprinkles, and Rita texted me the next morning asking for the recipe before she even said good morning. My sister now expects them at every family gathering without fail, and she is not the type to ask for seconds of anything.
Ingredients
- Red velvet cake (300 g, baked and cooled): Store bought works perfectly fine here, and honestly I have used leftover birthday cake with great results. Just make sure it is completely cool or the crumbs will turn into a sticky mess.
- Cream cheese (200 g, softened): Full fat cream cheese makes the creamiest filling, so do not even think about reaching for the low fat tub. Let it sit out for at least thirty minutes so it blends without lumps.
- Powdered sugar (40 g): This sweetens the filling without making it grainy, which is exactly what you want when the center should taste like a smooth cheesecake bite.
- Vanilla extract (1 tsp): A small amount goes a long way in the filling, and real vanilla rather than imitation makes a noticeable difference in the finished flavor.
- White chocolate (250 g): Good quality melting chocolate coats more evenly and sets with a nicer shine than cheap baking chips. You can swap in dark or milk chocolate if white is too sweet for your taste.
- Red food coloring (optional): A few drops tint the white chocolate coating to match the red velvet theme and makes them look stunning on a plate.
- Red velvet crumbs or sprinkles (optional): Save a handful of cake crumbs before mixing for a beautiful garnish that also hints at what is inside.
Instructions
- Crumble the cake:
- Break the red velvet cake into pieces and crumble it finely in a large bowl using your fingers or a fork. You want the texture of wet sand, with no large chunks hiding in there.
- Make the cheesecake filling:
- Beat the softened cream cheese, powdered sugar, and vanilla together until completely smooth and lump free. Taste it, because this is your chance to adjust the sweetness before mixing everything together.
- Combine into a dough:
- Pour the cream cheese mixture over the crumbs and work it in with your hands or a spatula until it forms a soft, cohesive dough that holds together when squeezed. If it feels too wet, chill it for fifteen minutes before rolling.
- Roll into balls:
- Scoop tablespoon sized portions and roll them between your palms, pressing firmly so they do not crack later. Place each one on a parchment lined tray as you go.
- Chill thoroughly:
- Refrigerate the tray for at least one full hour so the balls firm up enough to handle without falling apart in the warm chocolate. Do not skip this step no matter how impatient you feel.
- Melt the chocolate:
- Melt the white chocolate in a microwave safe bowl in short thirty second bursts, stirring between each one, or use a double boiler for gentler control. Stir in a drop or two of red food coloring if you want that gorgeous pink or red coating.
- Dip and coat:
- Drop each chilled ball into the chocolate, rolling it quickly with a fork to coat all sides, then lift it out and tap off the excess before placing it back on the parchment. Work in small batches so the chocolate stays warm and fluid.
- Decorate and set:
- Sprinkle crumbs or sprinkles over the wet chocolate immediately before it sets, because you only get a short window. Let them sit at room temperature or in the fridge until the shell is completely firm.
 Pin it
 One rainy Sunday afternoon my niece helped me roll an entire batch, her small hands pressing each ball with intense concentration while she narrated the process like a cooking show host. She ate three of them before the chocolate even set, chocolate smeared across her cheeks, and declared them the best thing we had ever made together. That memory sticks to me more than any recipe ever could.
Choosing Your Chocolate Coating
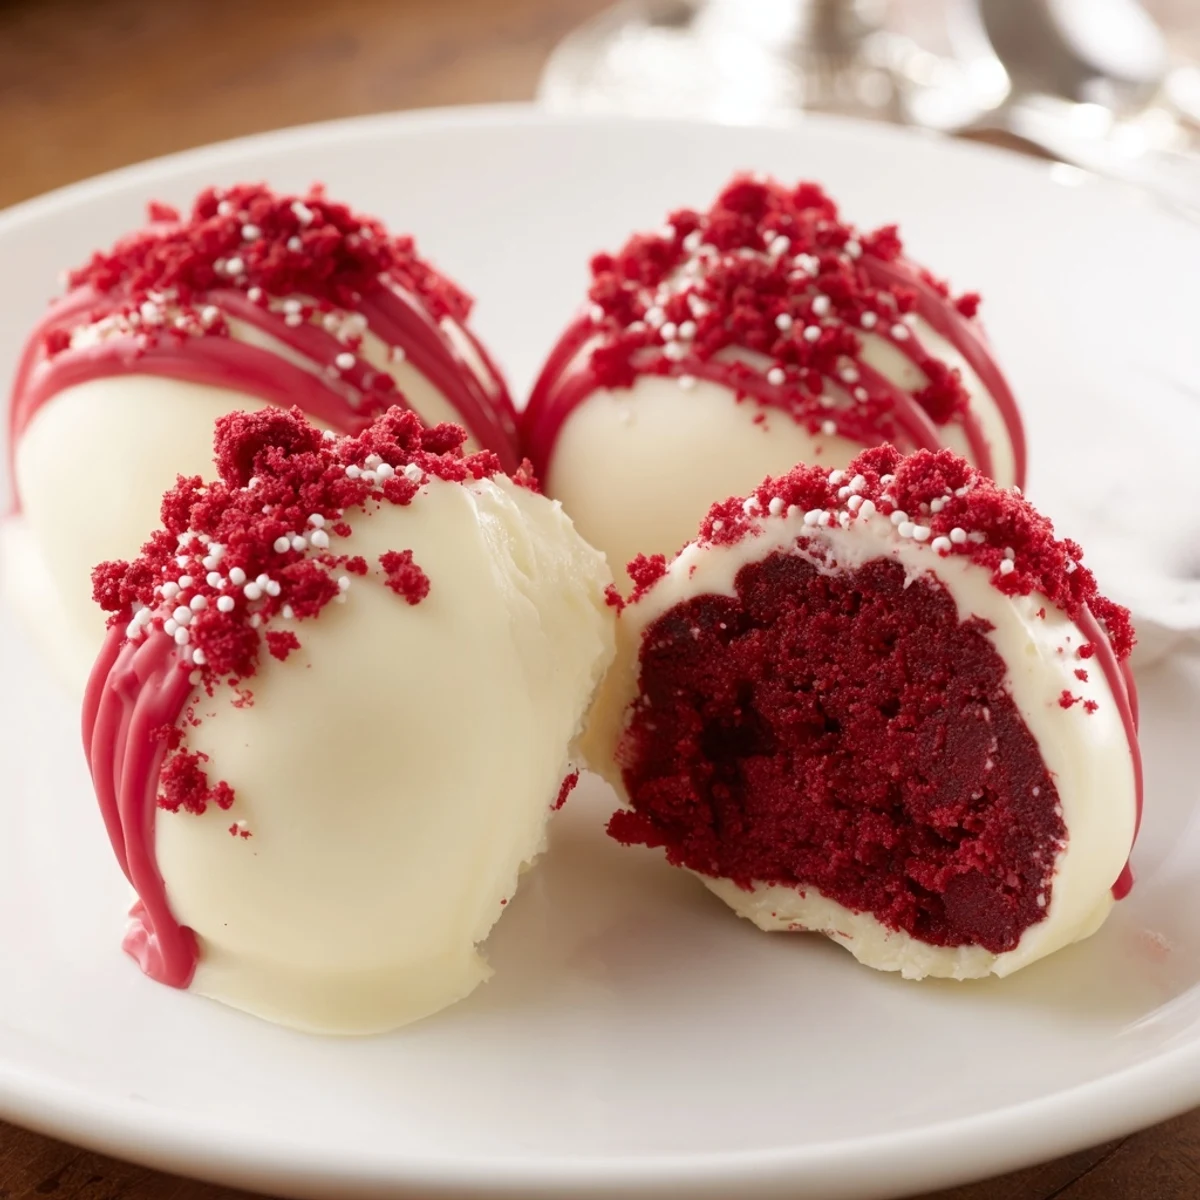
White chocolate gives the prettiest contrast against the red interior and takes food coloring beautifully if you want a coordinated look. Dark chocolate creates a more sophisticated flavor that balances the sweetness of the cake and filling, and it is my personal favorite for adult gatherings. Milk chocolate lands somewhere in between and pleases almost everyone, especially kids who find dark chocolate too intense. Whatever you choose, spend a little extra on decent chocolate because the coating is half the experience.
Storage and Make Ahead Tips
These keep beautifully in an airtight container in the refrigerator for up to five days, and the chocolate shell actually helps protect the creamy center from drying out. You can also freeze them for up to a month, just layer them between sheets of parchment so they do not stick together. I almost always make a double batch and stash half in the freezer for unexpected guests or late night cravings.
Variations Worth Trying
Once you master the basic technique, the variations are endless and honestly hard to stop experimenting with. Try rolling crushed nuts or toasted coconut into the filling for extra texture, or swap the vanilla extract for peppermint during the holidays for a completely different vibe.
- A tablespoon of espresso powder in the filling adds depth without tasting like coffee.
- Roll the finished balls in cocoa powder instead of dipping them in chocolate for a truffle style finish.
- Always let them come to room temperature for about ten minutes before serving for the best texture.
 Pin it
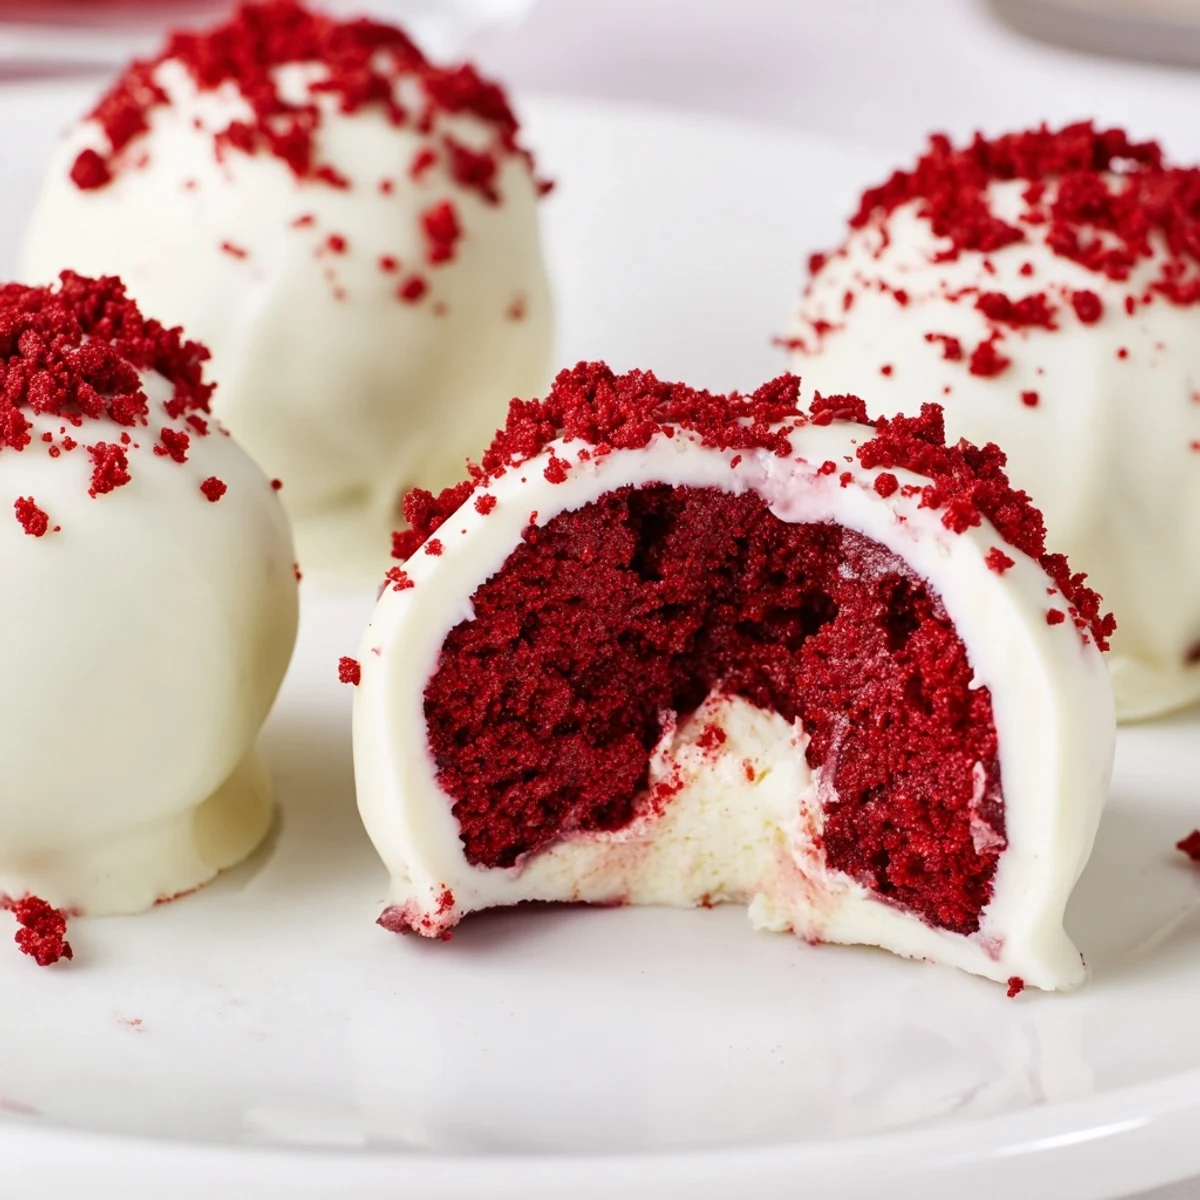
 These little bites of red velvet joy are proof that the best desserts do not need to be complicated or fussy to be completely irresistible. Make them once and watch them become the thing everyone asks you to bring.
Recipe FAQs
- → How long should I chill before dipping?
-
Chill the formed balls at least 1 hour so they firm up and hold their shape during dipping. Longer chilling yields a cleaner coating and less chance of collapse.
- → Can I use store-bought red velvet cake?
-
Yes. Use fully baked and cooled cake crumbled into fine crumbs. If the cake is very moist, gently press out excess moisture; if too dry, a tablespoon of cream cheese can help bind.
- → What chocolate works best for coating?
-
White chocolate gives a pale, customizable finish (add food coloring if desired); dark or semisweet offers richer contrast. Adding a teaspoon of neutral oil or shortening smooths the melt for dipping.
- → How do I prevent cracking in the chocolate coating?
-
Ensure the centers are thoroughly chilled and let excess chocolate drip off before placing on parchment. Avoid handling until the coating is fully set and keep the room cool while it sets.
- → Can I make variations to the filling?
-
Yes — fold in 1–2 tablespoons of crushed nuts, toasted coconut, or a splash of liqueur for flavor. Adjust powdered sugar to maintain a pliable, scoopable texture.
- → How should I store these bites and for how long?
-
Store in an airtight container in the refrigerator for up to 5 days. For best texture, let sit at cool room temperature for a few minutes before serving.
- → Are there allergy-friendly swaps?
-
Use dairy-free cream cheese and dairy-free chocolate to avoid milk; substitute a gluten-free red velvet cake or crumbs to remove gluten. Always check labels for traces of soy or nuts.
