 Pin it
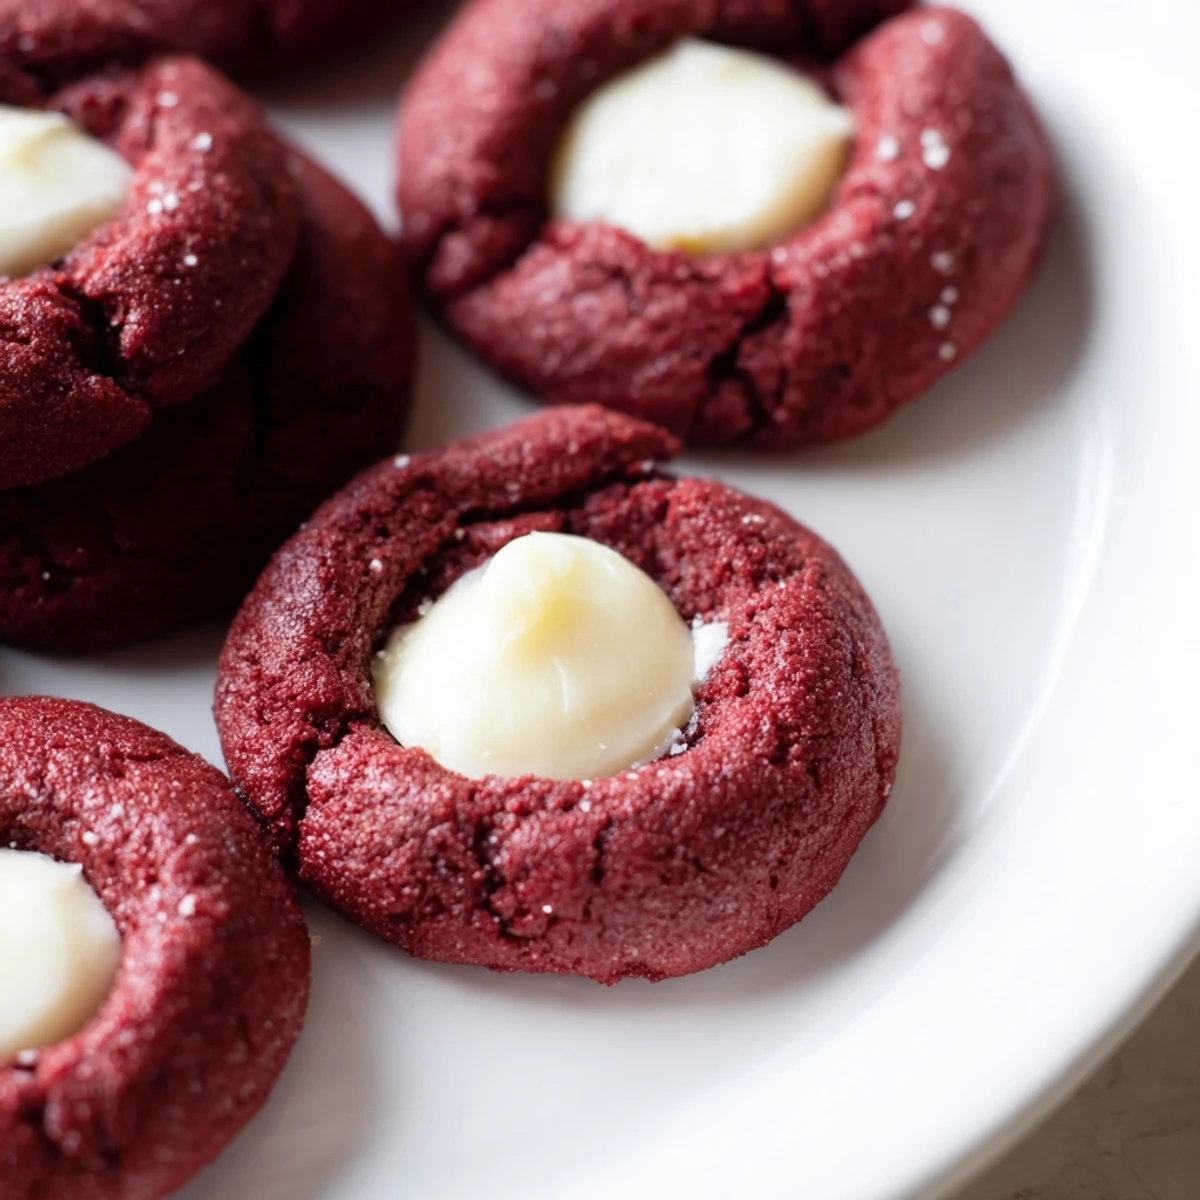
 These soft, cocoa-infused red velvet thumbprint cookies feature a tender crumb and indulgent cream cheese filling. The vibrant red dough comes together quickly with basic pantry staples, while the smooth cheesecake center adds a luxurious contrast. Each batch yields two dozen perfectly portioned treats, ideal for holiday platters or special occasions.
The first time I made these red velvet thumbprints, my kitchen counter looked like a crime scene with red food coloring everywhere. My roommate walked in, stopped dead in her tracks, and asked if I'd murdered a strawberry. But when she bit into one of those tender, cocoa-rich cookies with that velvety cream cheese center, all was forgiven. Now they're the most requested treat at every holiday gathering.
Last Christmas, my niece decided these were 'fancy cookies' and saved one on a special napkin to give to Santa. The next morning she came running into our room whispering that Santa must have loved them because there were only crumbs left. Watching her face light up over something so simple made all the red-stained fingertips worth it.
Ingredients
- All-purpose flour: The foundation that gives structure while keeping the crumb tender and delicate
- Unsweetened cocoa powder: Deep chocolate flavor that balances the sweetness and creates that signature red velvet taste
- Baking soda: Just enough lift to give the cookies a slight puff without losing their dense, fudgy texture
- Salt: Enhances the chocolate flavor and balances the sugar, so these never taste cloying
- Unsalted butter: Creates a rich, melt-in-your-mouth base, so bring it to room temperature for effortless creaming
- Granulated sugar: Sweetens the dough while creating that perfect crackly edge as it bakes
- Egg yolk: Adds richness and helps bind the dough without making it too cakey
- Whole milk: Brings moisture to the dough and helps activate the food coloring for a vibrant red
- Vanilla extract: Rounds out the chocolate with warm, aromatic sweetness that complements both cookie and filling
- Red food coloring: One teaspoon creates that gorgeous crimson hue that makes red velvet so iconic
- Cream cheese: Forms a tangy, creamy filling that cuts through the sweet cookie perfectly
- Powdered sugar: Sweetens the cream cheese filling while keeping it smooth and pipeable
Instructions
- Get your oven ready:
- Preheat to 350°F and line your baking sheets with parchment paper so nothing sticks
- Whisk the dry ingredients:
- Combine flour, cocoa powder, baking soda, and salt in a medium bowl until everything's evenly distributed
- Cream the butter and sugar:
- Beat them together for about 2 minutes until the mixture looks pale and fluffy
- Add the wet ingredients:
- Mix in the egg yolk, milk, vanilla, and red food coloring until the dough turns a stunning shade of red
- Combine everything:
- Gradually fold in the dry ingredients until just combined, being careful not to overmix
- Make the filling:
- Whisk the softened cream cheese with powdered sugar and vanilla until smooth and creamy
- Shape the cookies:
- Roll dough into 1-inch balls and space them 2 inches apart on your prepared baking sheets
- Create the thumbprint:
- Gently press your thumb or a teaspoon into each ball to form a deep well for the filling
- Fill the centers:
- Spoon about 1/2 teaspoon of cream cheese mixture into each indentation, mounding slightly
- Bake to perfection:
- Slide into the oven for 11 to 13 minutes until edges are set but centers still look slightly soft
- Cool completely:
- Let them rest on the baking sheet for 5 minutes, then move to a wire rack until fully cool
 Pin it
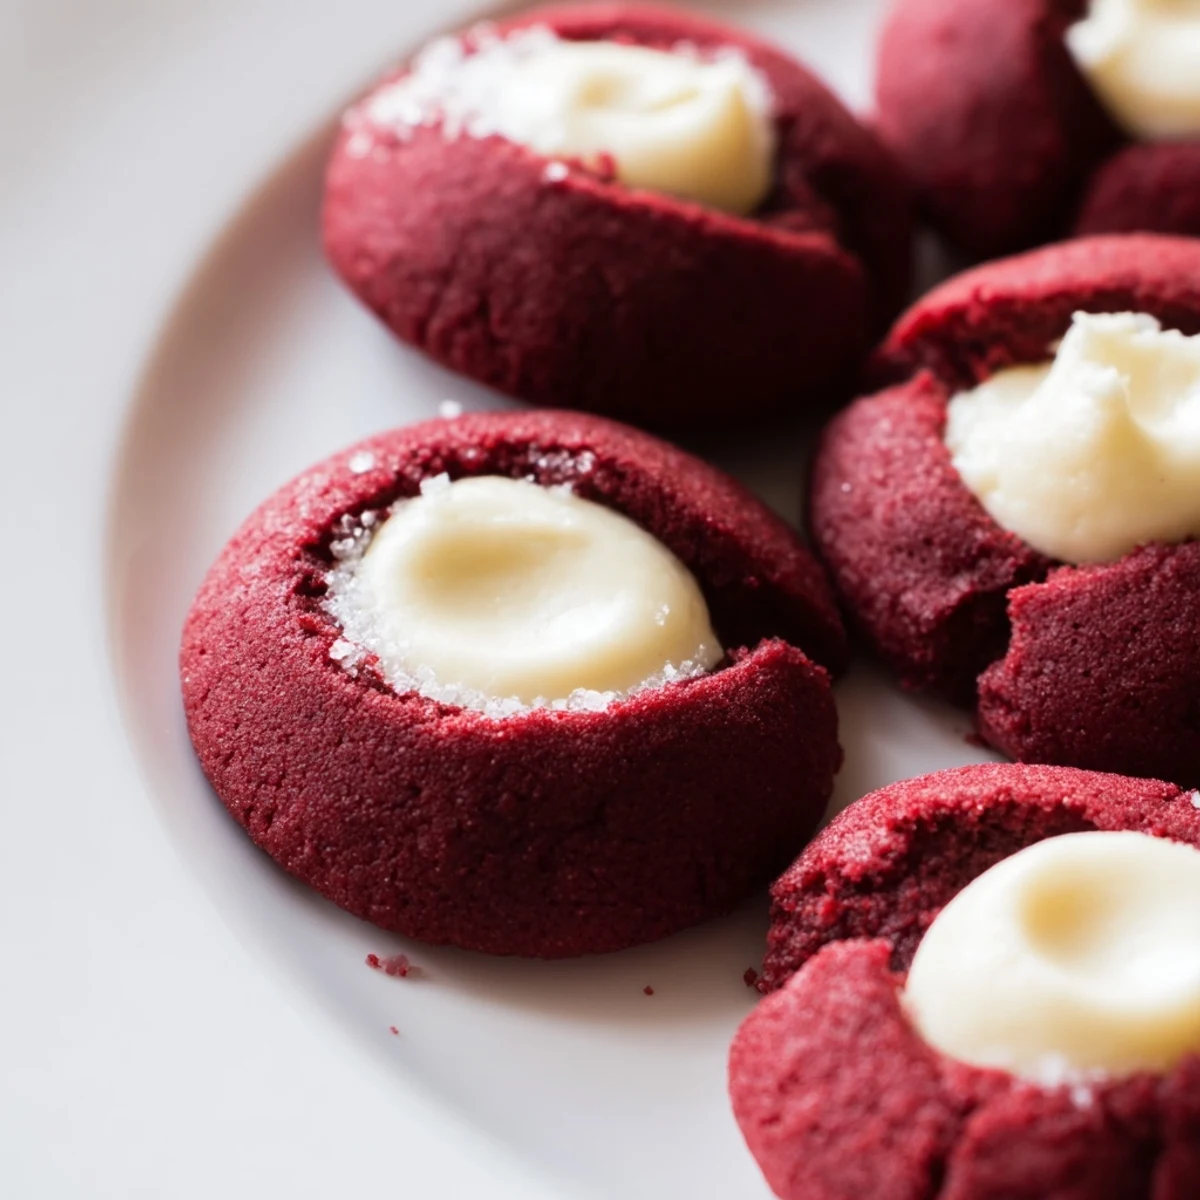
 My grandmother always said the best cookies are the ones that make you pause mid-bite. With these, the way the tangy cream cheese plays against that rich chocolate crumb does exactly that. They've become the cookie I bring to people who need a little extra comfort.
Making Them Your Own
Sometimes I swap the cream cheese filling for white chocolate ganache when I want something even more indulgent. The way that warm chocolate pools into the thumbprint and sets into a silky center is absolutely divine.
Timing Is Everything
I've learned that pulling these out exactly when the edges look set but the centers still seem slightly underdone is the secret to that perfectly tender texture. They continue cooking on the hot baking sheet, so resist the urge to leave them in longer.
Serving Suggestions
These red velvet thumbprints are stunning on their own, but a few simple touches make them feel extra special. I love packing them into clear treat bags tied with red ribbon for edible gifts.
- Sprinkle crushed candy canes on top right after baking for a festive holiday touch
- Dust the cooled cookies with a light snowfall of powdered sugar for extra elegance
- Serve them alongside hot cocoa or coffee for the ultimate winter dessert experience
 Pin it
 There's something about that first bite, the way the creamy filling hits your tongue right after the tender chocolate crumb, that makes these cookies unforgettable. Hope they become a favorite in your kitchen too.
Recipe FAQs
- → What makes red velvet thumbprint cookies different from regular thumbprints?
-
The distinctive red velvet flavor comes from cocoa powder combined with a small amount of red food coloring, creating that classic vibrant hue and subtle chocolate taste. The texture is notably tender and soft compared to traditional sugar cookie varieties.
- → Can I use white chocolate instead of cream cheese filling?
-
Absolutely. White chocolate ganache makes an excellent alternative filling. Simply melt white chocolate with a touch of heavy cream and fill the indentations before baking. The sweetness pairs beautifully with the cocoa notes.
- → How do I prevent the indentations from closing during baking?
-
Press the centers firmly with your thumb or a teaspoon measure, creating a deep well. If the dough bounces back, press again after a minute. The filling also helps maintain the indentation shape as the cookies bake.
- → Why is my dough too sticky to roll into balls?
-
Chill the dough for 15-20 minutes if it feels too soft or sticky. The butter content can make the dough pliable, especially in warm kitchens. Lightly dusting your hands with flour also helps prevent sticking while rolling.
- → How long do these cookies stay fresh?
-
Stored in an airtight container in the refrigerator, these cookies maintain their texture and flavor for up to 4 days. The cream cheese filling requires refrigeration for food safety. Bring to room temperature 10 minutes before serving for the best texture.
- → Can I freeze red velvet thumbprint cookies?
-
Yes, freeze unfilled baked cookies for up to 3 months. Thaw and fill with fresh cream cheese mixture before serving. Alternatively, freeze the dough balls and bake fresh, filling them after they come out of the oven.
