 Pin it
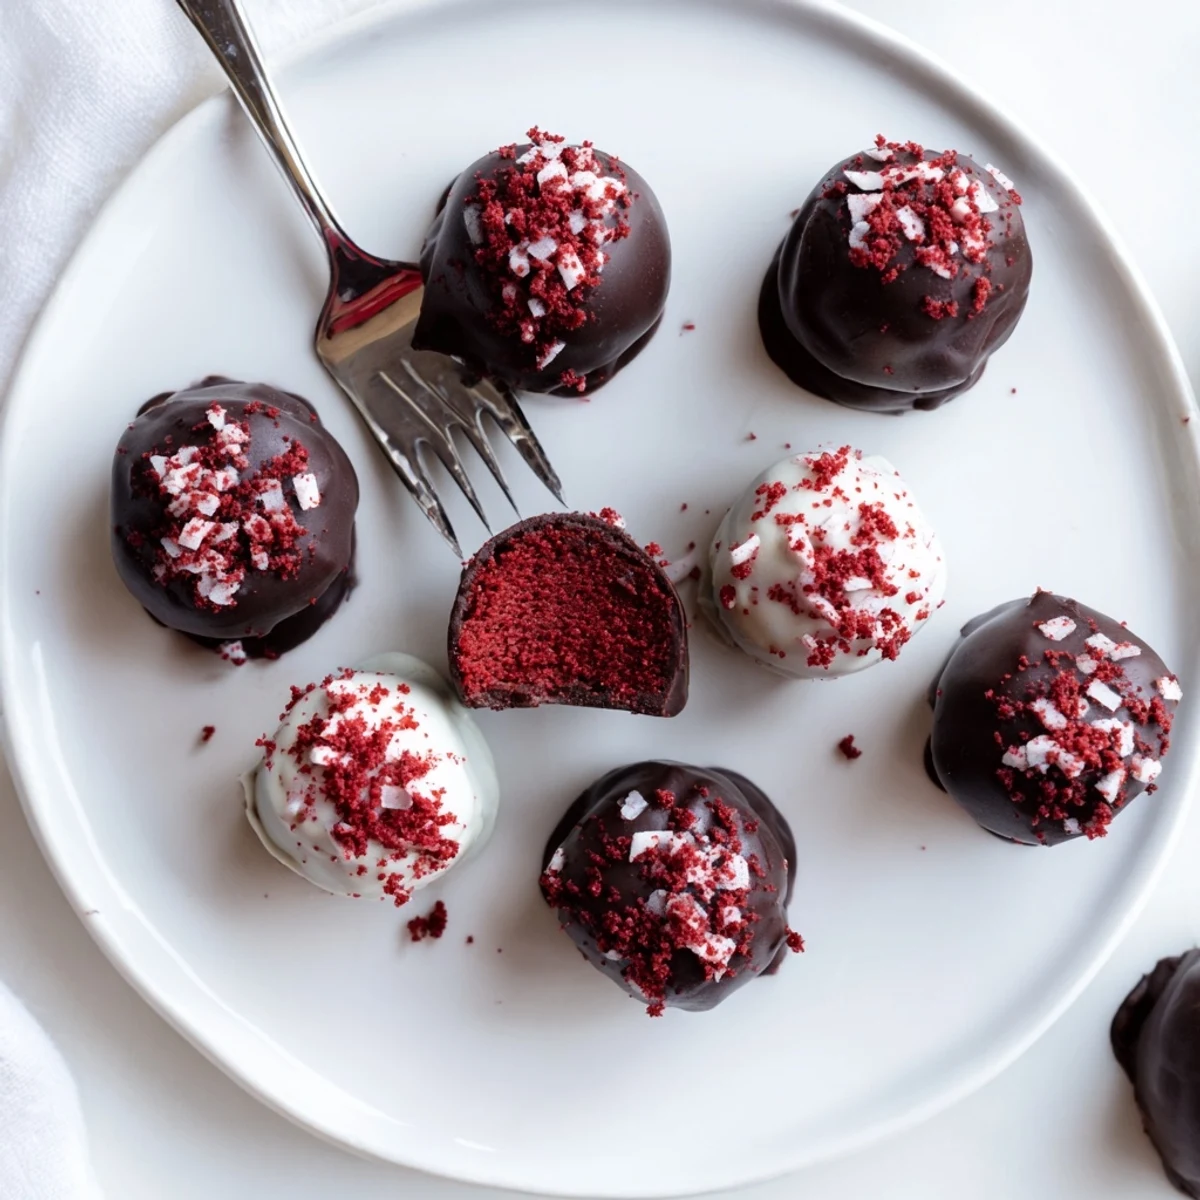
 These red velvet cheesecake balls combine two beloved desserts into one portable treat. Moist, vibrantly colored red velvet cake is crumbled and mixed with a sweetened cream cheese filling, then rolled into uniform spheres. Each ball gets dipped in melted chocolate—white or dark—creating a crisp shell that gives way to the creamy center within.
The process is straightforward: bake a simple red velvet sheet cake, whip together a quick cheesecake mixture, combine and chill, then coat with chocolate. The chilling step is crucial for easy handling and clean dipping. Ready in under two hours with most of that time being hands-off chilling.
Perfect for holiday platters, birthday celebrations, or whenever you need an impressive yet manageable sweet. These bite-sized delights store beautifully in the refrigerator or freezer, making them ideal for advance preparation.
The oven door had barely clicked shut when my kitchen turned into a cloud of cocoa scented warmth and the faintest whisper of something sweet baking underneath. I was attempting red velvet cheesecake balls for a friend's potluck, fully expecting them to look like a Pinterest fail. Instead, they vanished within fifteen minutes of arriving, and three strangers asked for the recipe before dessert was even over.
I made a second batch the following weekend just to test whether rolling the balls smaller would make them more elegant. It did, but honestly the slightly chunky ones from my first attempt had more charm and nobody complained about aesthetics when their mouths were full.
Ingredients
- All purpose flour (1 1/4 cups, 160 g): The backbone of the red velvet sponge. Spoon it into the cup and level it off rather than scooping, which packs it down and makes the cake dense.
- Granulated sugar (3/4 cup, 150 g): Just enough sweetness without tipping the cake into cloying territory, since the coating and filling bring their own sugar to the party.
- Unsweetened cocoa powder (2 tbsp, 16 g): Red velvet is secretly a chocolate cake in disguise, and this small amount gives it that subtle depth without overpowering the color.
- Baking soda (1/2 tsp) and salt (1/4 tsp): Standard leavening and flavor balance. Do not skip the salt even in sweet recipes, it makes everything taste more like itself.
- Buttermilk (1/2 cup, 120 ml, room temperature): This tenderizes the crumb and adds a gentle tang. If you are out, stir a half teaspoon of lemon juice into regular milk and let it sit for five minutes.
- Unsalted butter (1/2 cup, 110 g, softened): Softened means it holds a light fingerprint when pressed, not melted. Cold butter leaves lumps and melted butter changes the cake texture entirely.
- Large eggs (2, room temperature): Room temperature eggs incorporate more evenly into the batter. Pull them out when you preheat the oven and they will be ready by the time you need them.
- Vanilla extract (1 tsp for cake, 1/2 tsp for filling): Use real extract, not imitation. The flavor difference is noticeable, especially in a cake with so few ingredients.
- Red food coloring (1 tbsp): Gel coloring gives you the most vibrant red with the least liquid, but liquid works fine if that is what you have.
- Cream cheese (8 oz, 225 g, softened): Full fat cream cheese makes the filling luscious and thick. Low fat versions tend to be watery and will make the balls difficult to roll.
- Powdered sugar (1/4 cup, 30 g): Sweetens the filling without adding grit. Sift it if it looks clumpy.
- White or dark chocolate (10 oz, 285 g, chopped or melting wafers): Melting wafers are foolproof for coating. If using bars, chop them finely so they melt evenly without seizing.
- Red or white sprinkles (optional): A cheerful finishing touch that makes these feel like a celebration even on a random Tuesday.
Instructions
- Bake the red velvet cake:
- Preheat your oven to 350F (175C) and line an 8x8 inch pan with parchment. Whisk the flour, sugar, cocoa, baking soda, and salt in one bowl, then combine the buttermilk, butter, eggs, vanilla, and food coloring in another. Fold the wet into the dry until just smooth and pour into the pan. Bake for 18 to 20 minutes until a toothpick slides out clean, then let it cool completely, because patience here saves you from mushy balls later.
- Whip up the cheesecake filling:
- Beat the cream cheese, powdered sugar, and vanilla together until silky with no lumps hiding in the corners. If it feels too soft to hold its shape, give it fifteen minutes in the fridge to firm up while you crumble the cake.
- Roll the balls:
- Crumble the cooled cake into fine pieces in a large bowl, then add the cheesecake mixture and work it together with your hands or a spoon until it forms a cohesive dough. Roll into one inch balls and set them on a parchment lined sheet. Freeze for a full hour so they hold their shape during dipping.
- Dip and coat:
- Melt the chocolate in a microwave safe bowl in twenty second bursts, stirring between each one until the chocolate is glossy and smooth. Drop a frozen ball in, roll it gently with a fork to coat it completely, then lift it out and tap off the excess before placing it back on the parchment. Add sprinkles immediately before the shell sets, because you only get one window of opportunity.
- Let them set:
- Leave the coated balls at room temperature until the chocolate hardens, or slide the tray into the fridge for faster results. Serve them chilled or let them come to room temperature, both ways are delicious.
 Pin it
 There is something quietly satisfying about peeling a perfectly smooth, glossy cheesecake ball off the parchment for the first time and seeing your own fingerprint preserved in the chocolate shell like a tiny signature.
Choosing Your Chocolate Coating
Dark chocolate gives a sophisticated bittersweet contrast to the sweet cake and filling, while white chocolate turns these into pure confectionery joy. Ruby chocolate is a gorgeous middle ground with a berry undertone that complements the red velvet beautifully.
Making Them Ahead for Gatherings
These freeze exceptionally well for up to a month if stored in an airtight container with parchment between layers. I always make a double batch and tuck half into the freezer before guests arrive so there is no last minute scrambling.
Storage and Serving Suggestions
Keep them in the fridge in a sealed container and they stay perfect for about a week. Let them sit out for ten minutes before serving so the chocolate softens slightly and the cheesecake center becomes creamy again rather than firm.
- Transport them in the container they were stored in rather than transferring to a platter, which risks cracking the shells.
- A splash of Chambord or Baileys in the cheesecake filling turns these into an entirely adult affair that pairs wonderfully with after dinner coffee.
- Label the container if you are bringing them to a party, because unlabeled treats have a way of disappearing into coat pockets.
 Pin it
 Every time I make these, someone tells me they look professionally made, and I never correct them. Some kitchen secrets are worth keeping, and this one tastes even better than it looks.
Recipe FAQs
- → Can I make these ahead of time?
-
Absolutely. These balls store exceptionally well in the refrigerator for up to a week, or in the freezer for a month. The chocolate coating actually helps maintain freshness. Thaw frozen treats in the refrigerator before serving.
- → What's the best chocolate for coating?
-
White chocolate creates a stunning contrast against the red velvet, while dark chocolate offers a sophisticated bittersweet balance. Use melting wafers or finely chopped bars for smoothest results. Avoid chocolate chips as they contain stabilizers that prevent proper melting.
- → Why did my cake balls fall apart when dipping?
-
This usually means the mixture wasn't chilled long enough or the cake-to-cheesecake ratio is off. Ensure the formed balls freeze for at least one hour before coating. If the dough feels too crumbly, add another tablespoon of cream cheese mixture to help bind everything together.
- → Can I use store-bought cake instead of homemade?
-
Yes, a boxed red velvet cake mix works perfectly in this recipe. Simply prepare according to package directions in an 8x8 or 9x9 inch pan. The texture will be slightly different but still delicious. Just ensure the cake is completely cooled before crumbling.
- → How do I get smooth chocolate coating?
-
Work with slightly chilled balls and room-temperature melted chocolate. Use a fork or dipping tool to lower each ball into the chocolate, lift and tap gently against the bowl edge to remove excess. For an ultra-smooth finish, let the excess chocolate drip off rather than shaking.
- → What's the easiest way to crumble the cake?
-
Break the cooled cake into large chunks, then use clean hands to rub it between your palms into fine crumbs. Alternatively, pulse in a food processor using short bursts—don't over-process or you'll get a paste. A fork works well too for a more textured crumb.
