 Pin it
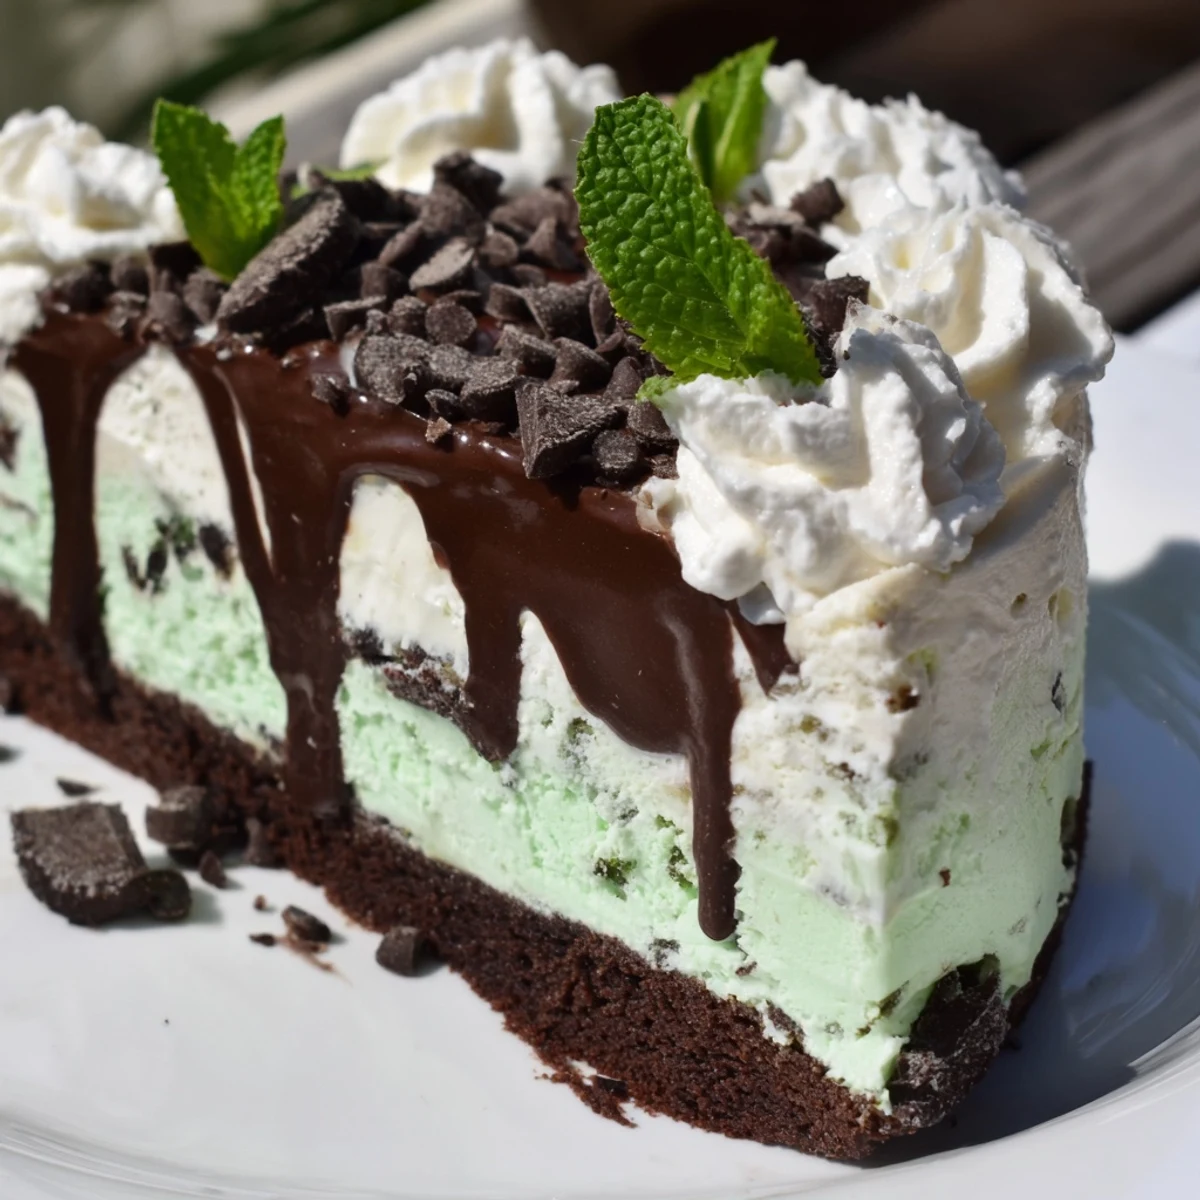
 This dessert combines a moist chocolate cake base with soft, slightly softened mint chocolate chip ice cream spread evenly on top. After freezing until firm, the cake is adorned with whipped cream, smooth chocolate ganache, mini chocolate chips, and fresh mint leaves for a refreshing, rich finish. Preparation includes baking the cake, layering with ice cream, and final chilling, creating a cool and indulgent treat perfect for gatherings.
The day my youngest discovered mint and chocolate together was chaos. She'd been pestering me to make something green for St. Patrick's Day, and I was desperate for a dessert that didn't involve food coloring or shamrock-shaped cookies. This ice cream cake emerged from a late-night experiment when I realized the mint chip ice cream in our freezer could become something spectacular with a little effort and patience.
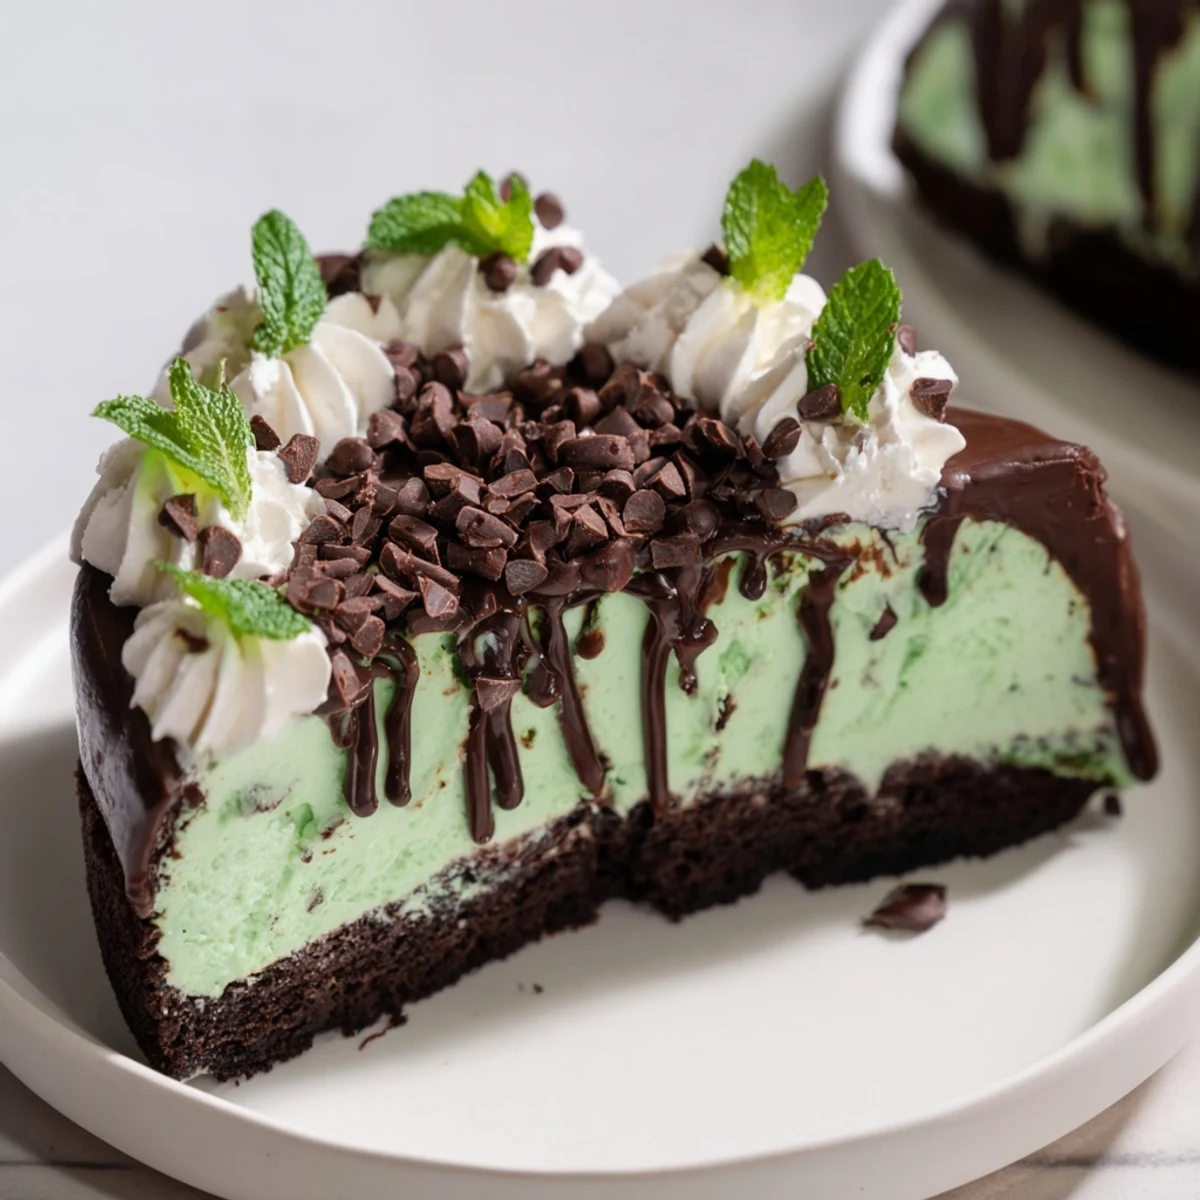
My sister-in-law asked for this recipe three birthdays in a row after I first served it at a summer barbecue. She claimed she'd been dreaming about the way the chocolate ganache cracked when she cut into it, revealing that mint green layer underneath. Now it's become the official birthday cake for everyone in our family who claims they don't like cake.
Ingredients
- All-purpose flour: The foundation that gives structure to support all that ice cream weight
- Unsweetened cocoa powder: Dont skip this because it provides that deep chocolate flavor that balances the mint
- Buttermilk: Makes the cake tender and keeps it moist even after freezing
- Hot water: The secret trick that blooms the cocoa powder and intensifies chocolate flavor
- Mint chocolate chip ice cream: Use a good quality brand because you can really taste the difference
- Heavy whipping cream: Essential for both the stabilized whipped topping and silky ganache
- Semi-sweet chocolate chips: Creates a ganache that sets perfectly without being too bitter
Instructions
- Bake the foundation:
- Preheat your oven to 350°F and prepare a 9-inch springform pan like your life depends on it—grease that thing thoroughly and line the bottom with parchment paper. Mix the dry ingredients in one bowl, then whisk in the buttermilk, hot water, oil, egg, and vanilla until you have a smooth glossy batter.
- Cool and prepare:
- Bake for 25 to 30 minutes until a toothpick comes out clean, then let it hang out in the pan for 10 minutes before moving it to a wire rack. Let it cool completely because warm cake equals melted ice cream disaster.
- Build the layers:
- Clean your springform pan and line it with plastic wrap or parchment, leaving overhang for easy removal later. Place your cooled cake at the bottom and spread that softened mint chocolate chip ice cream over it like youre frosting a cake, smoothing the top with your spatula.
- Freeze until firm:
- Cover the whole thing and freeze for at least 4 hours or overnight if youre planning ahead. This step is non-negotiable unless you want ice cream soup instead of a sliceable cake.
- Make the toppings:
- Whip the heavy cream with powdered sugar and vanilla until stiff peaks form, then heat some cream until its barely simmering and pour it over chocolate chips. Wait exactly 2 minutes then stir until you have the most gorgeous glossy ganache youve ever seen.
- Final assembly:
- Release your cake from the pan and transfer it to your serving platter, then either spread or pipe that whipped cream all over the top. Drizzle with the ganache and finish with mini chocolate chips and fresh mint if youre feeling fancy.
 Pin it
 Last summer my neighbor knocked on my door while this was freezing, drawn by the smell of baking chocolate cake. She left three hours later with the recipe written on a napkin and a promise to bring the vanilla ice cream next time.
Make It Ahead Like A Pro
This cake actually tastes better when made 1 to 2 days ahead of serving because the flavors have time to meld together. I once made it the morning of a party and the ice cream layer was still slightly soft, making the final assembly stressful. Now I always build and freeze it the night before, giving myself plenty of time to prepare for a stress-free dessert moment.
Flavor Variations That Work
While mint chocolate chip is classic, Ive experimented with coffee ice cream and mocha cake, strawberry ice cream with vanilla cake, and even cookies and cream. The key is pairing complementary flavors that wont compete with each other. My kids favorite variation uses cookies and cream ice cream with extra crushed Oreos folded into the whipped cream topping.
Serving And Storage Secrets
Keep this cake frozen until the absolute last minute before serving, then work efficiently when adding your whipped cream and ganache. Store any leftovers wrapped tightly in plastic wrap and foil for up to a week in the freezer. I learned the hard way that freezer burn can ruin even the most perfect cake, so proper storage matters more than you might think.
- Let slices sit for 2 minutes before serving so the texture softens slightly
- The ganache firms up in the cold freezer but softens beautifully at room temperature
- Individual slices freeze exceptionally well wrapped in plastic for midnight snacks
 Pin it
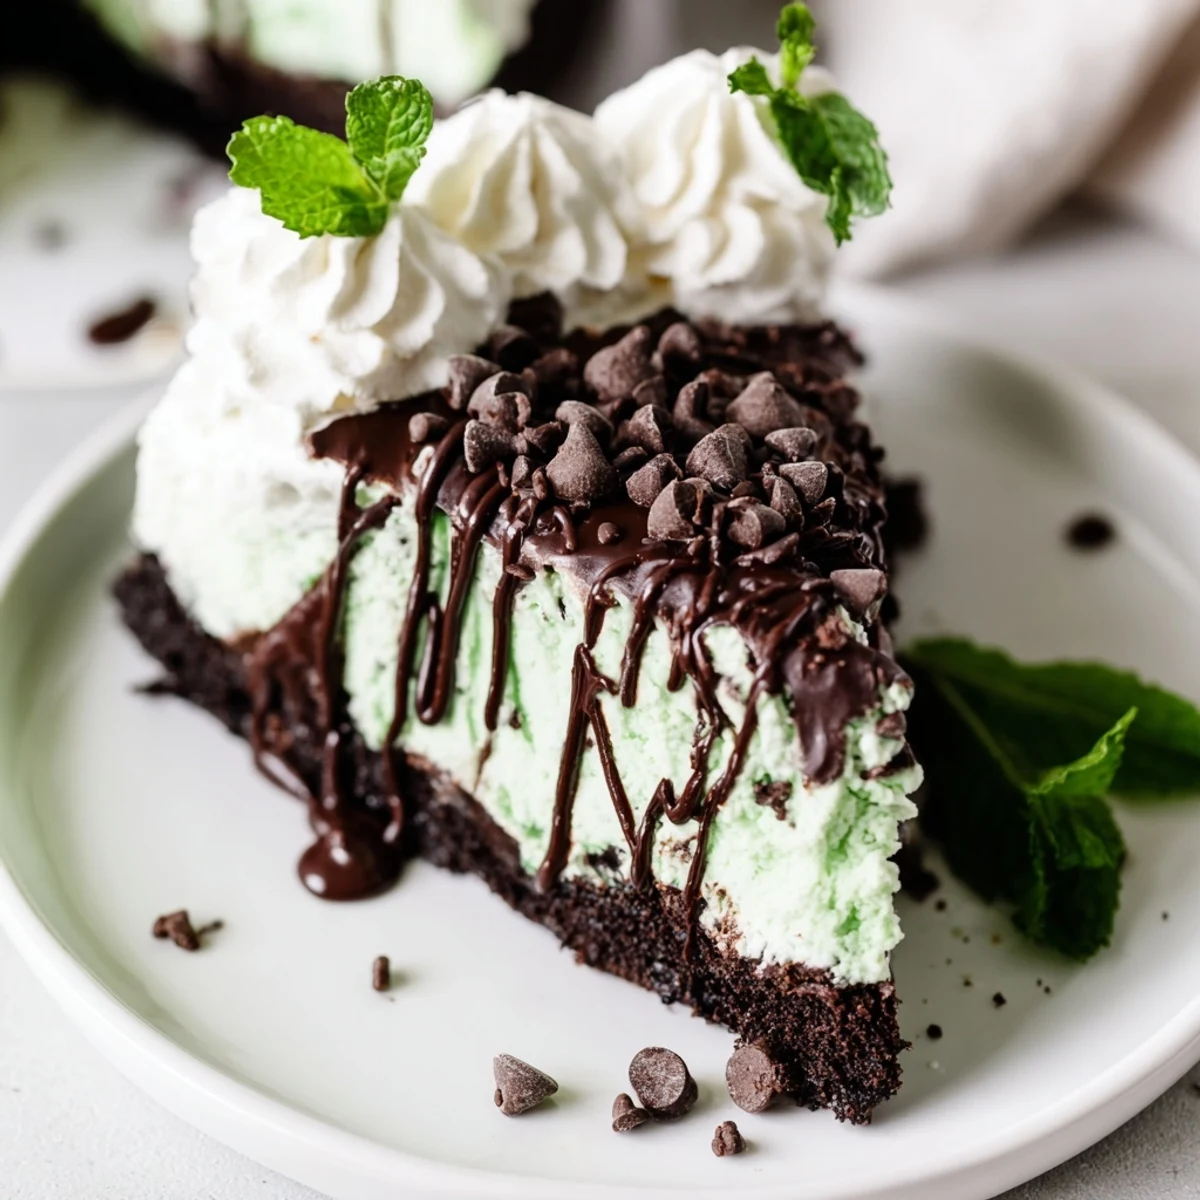
 Watch people's faces when they cut into this and discover that mint layer hiding underneath the chocolate. Every single time someone takes their first bite they get quiet for a second, then look at me like I've just revealed a magic trick.
Recipe FAQs
- → How do I prevent the cake from sticking to the pan?
-
Grease the springform pan well and line the bottom with parchment paper before adding the batter. This ensures easy removal after baking.
- → Can I use other ice cream flavors instead of mint chocolate chip?
-
Yes, any flavor can be substituted to customize the dessert according to your taste preferences.
- → How long should the dessert freeze before serving?
-
Freeze the layered cake for at least 4 hours to ensure the ice cream layer firms up properly for clean slicing.
- → What is the best way to slice the dessert?
-
Use a hot, sharp knife to slice cleanly through the cake and frozen ice cream layers without crumbling.
- → Can I prepare this dessert in advance?
-
Yes, it can be assembled up to 2 days ahead and stored frozen to maintain freshness and texture.
