 Pin it
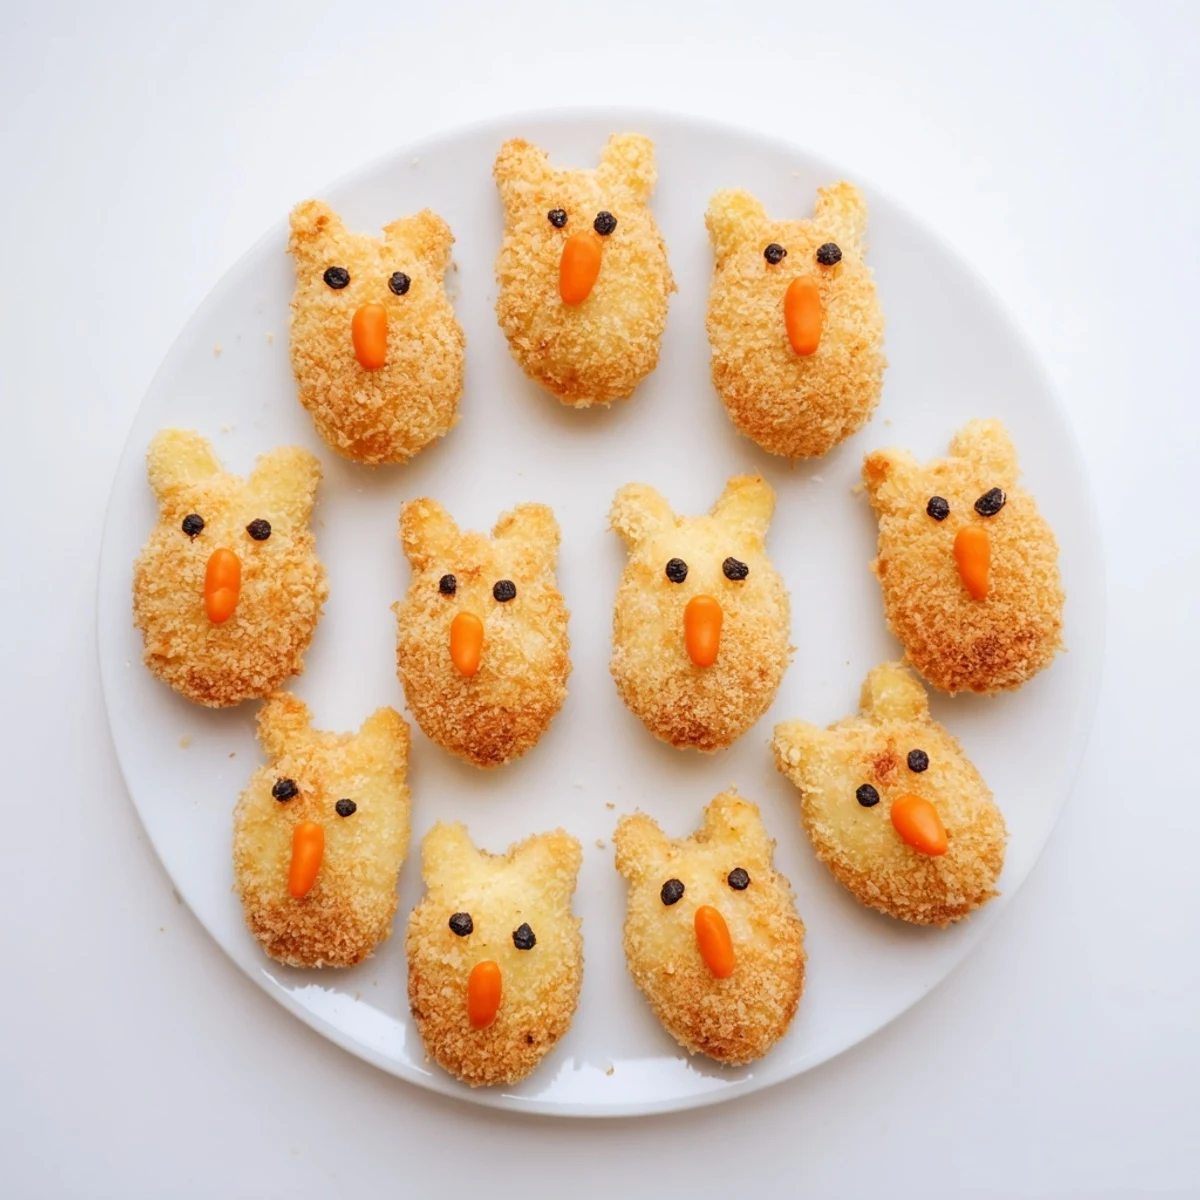
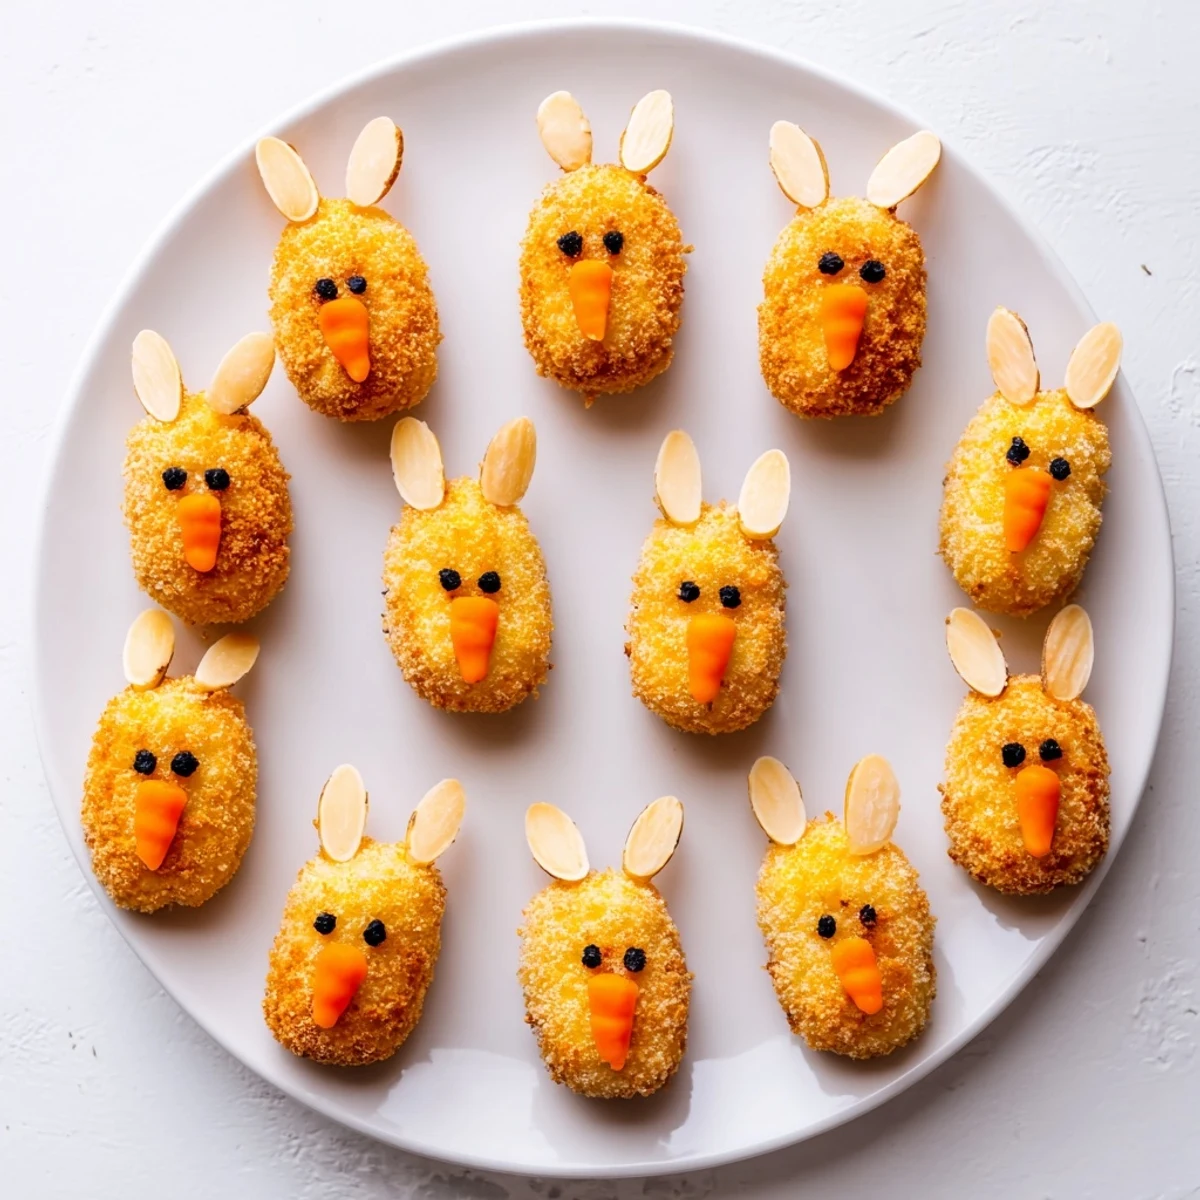
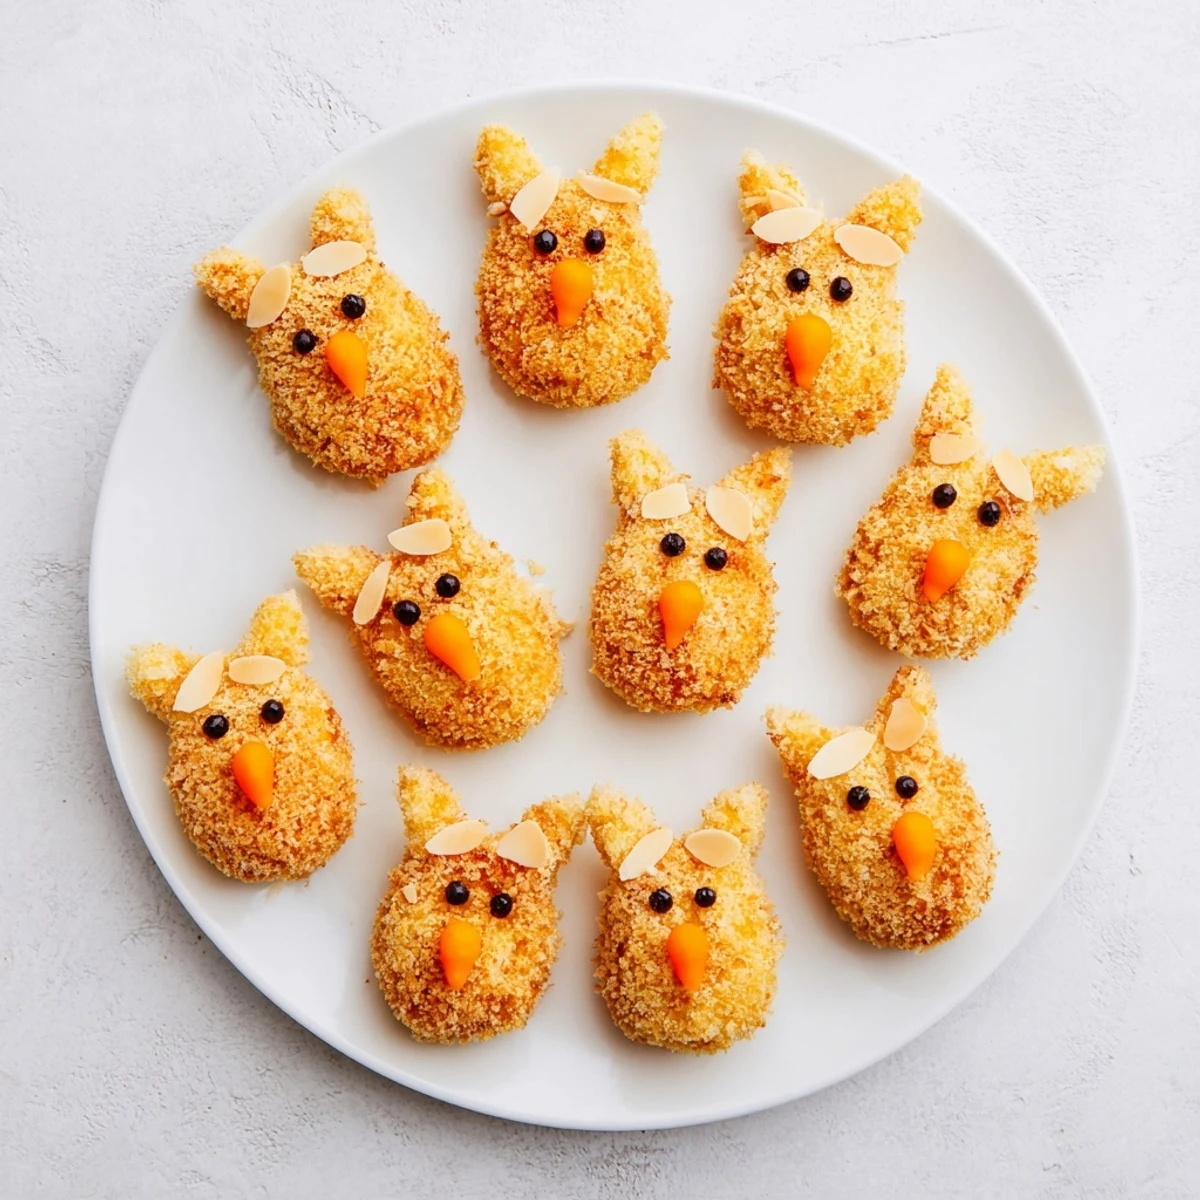
 These charming potato creations bring festive fun to your Easter table. Mashed russet potatoes blend with butter, Parmesan, and egg yolks for a rich, creamy base. Hand-shaped into oval bunny heads with pointed ears, each gets coated in flour, egg, and panko before frying to golden perfection.
The crispy exterior gives way to pillowy, seasoned potato inside. Decorations are simple yet effective: sliced almonds form perky ears, black peppercorns create eyes, and tiny carrot pieces make noses. Kids love helping shape and decorate these bite-sized treats.
Fry at 170°C for 2-3 minutes per side until beautifully browned. Drain well and serve slightly warm so decorations stay secure. Pair with herbed sour cream or garlic aioli for dipping.
The first Easter I made these, my niece stared at the serving platter wide-eyed and whispered, "Bunnies?" before reaching in with both hands. That moment of pure kitchen magic made the extra shaping time completely worth it. Now theyre the one thing everyone actually asks for weeks before the holiday arrives.
Last year I made thirty-six of them for our family gathering, and my brother-in-law stood by the stove eating them straight from the cooling rack. By dinner time, Id only managed to save twelve for the actual table. Now I always double the batch just to account for the kitchen snacking that inevitably happens.
Ingredients
- 800 g russet potatoes: High-starch potatoes give you that fluffy interior that contrasts perfectly with the crispy coating, and Ive learned waxy potatoes just dont achieve the same lightness
- 50 g unsalted butter: Room temperature butter incorporates more evenly into the warm potatoes, creating that silky smooth texture
- 2 egg yolks: The yolks enrich the potato mixture and help bind everything together without making it heavy
- 80 g grated Parmesan cheese: Adds a savory depth that makes these feel special rather than just plain fried potatoes
- Salt and pepper: Generous seasoning is crucial since the breading will mellow some of the flavor
- 1/4 tsp ground nutmeg: This tiny amount creates a subtle warmth that makes people ask "Whats that?" without being able to place it
- 60 g all-purpose flour: Creates the first layer of coating that helps the egg wash adhere evenly
- 2 large eggs: Beaten until loose enough to coat smoothly but not so frothy that it slides right off
- 100 g panko breadcrumbs: Larger surface area means more crunch, and I prefer them over regular crumbs for that extra crispy texture
- 24 sliced almonds: These become the most charming floppy bunny ears when pressed in carefully
- 12 whole black peppercorns: Perfect beady little eyes that you can actually eat, though small olive rounds work beautifully too
- 12 small pieces of carrot: Tiny orange noses that add such personality and a pop of color
- Vegetable oil: Something neutral with a high smoke point, enough to float the croquettes without crowding them
Instructions
- Prepare the potato base:
- Cook the diced potatoes in salted water until they surrender completely to a fork test, then drain them well and let them steam off in the hot pot for a few minutes. Mash them thoroughly while theyre still hot so they become perfectly smooth without any lumps.
- Season the mixture:
- Work in the butter first while the potatoes are hot enough to melt it, then add the egg yolks, Parmesan, salt, pepper, and nutmeg until everything is fully incorporated. Let this mixture cool enough to handle, as warm potatoes make shaping frustratingly difficult.
- Shape your bunnies:
- Divide into twelve portions and roll each into an oval for the head, then form two smaller ear shapes and attach them by gently pressing and smoothing the seam. The first few might look a bit awkward, but your hands will quickly learn the right pressure and motion.
- Add the faces:
- Press almond slices into the top for ears, peppercorns for eyes, and a tiny carrot triangle for the nose, being gentle so the surface stays intact. Take your time here since these little details are what make them so charming.
- Set up your breading station:
- Arrange three shallow bowls with flour, beaten eggs, and panko in that order, and keep one hand dry for flour and one hand wet for eggs to avoid the dreaded clumpy fingers situation. This simple trick makes the whole process so much smoother.
- Coat each croquette:
- Dredge each bunny lightly in flour, shake off the excess, dip into egg until fully coated, then press into panko until thoroughly covered. Place them on a baking sheet as you work so they dont stick together before frying.
- Fry to golden perfection:
- Heat your oil to 170°C and fry in small batches for 2-3 minutes per side until deeply golden all over, watching carefully as the decorations can brown faster than the breading. Transfer immediately to paper towels to drain while you finish the rest.
 Pin it
 These have become such a tradition that my youngest now helps me with the bunny faces, though her interpretation tends toward the abstract. Those lopsided, lop-eared versions somehow taste even better than the perfect ones. Some recipes you follow for the food, but this one Ive kept because of the moments it creates around the counter.
Making Ahead Like a Pro
Ive learned through holiday chaos that you can shape and bread these croquettes up to 24 hours ahead, keeping them layered between parchment paper in the refrigerator. This means you can do all the fussy decorating work the day before and simply fry them just before serving. The cold time actually helps them hold their shape better during frying.
Oil Temperature Secrets
Too cold and theyll absorb oil like sponges, too hot and the outside burns before the inside heats through. I keep a thermometer clipped to the side of the pan and let the oil come back to temperature between batches. Its worth the extra few minutes for that perfectly crispy exterior that stays satisfying even at room temperature.
Serving Suggestions That Work
These shine alongside simple roasted vegetables or as part of a larger appetizer spread. The herbed sour cream mentioned in the notes balances the richness beautifully, though a garlicky aioli never disappoints either.
- Arrange them on a bed of fresh parsley or lettuce to resemble grass for an extra festive touch
- Keep them warm in a 200°F oven if youre frying multiple batches before serving
- Make a double batch because people will absolutely eat more than they expect
 Pin it
 These little bunnies have become the most requested addition to our holiday table, and honestly, I love every minute of making them. Hope they bring the same joy to your kitchen.
Recipe FAQs
- → Can I prepare these potato shapes ahead of time?
-
Absolutely. Shape and bread the potato bunnies up to 24 hours in advance. Refrigerate on a parchment-lined baking sheet covered loosely with plastic wrap. Fry just before serving for best texture and appearance.
- → What's the best potato variety for these croquettes?
-
Russet potatoes work beautifully due to their high starch content and fluffy texture when mashed. Yukon Gold makes a creamier alternative, though the shapes may hold slightly less firmly during frying.
- → Can these be baked instead of fried?
-
Yes, brush with olive oil and bake at 200°C (400°F) for 20-25 minutes, turning halfway. The exterior will be less crispy than fried, but still delicious. Spray lightly with oil for better browning.
- → How do I keep the decorations from falling off during cooking?
-
Press almonds, peppercorns, and carrot pieces firmly into the shaped potato before breading. The flour, egg, and panko layers help secure decorations. Avoid overcrowding the fryer, which can cause decorations to knock loose.
- → What dipping sauces complement these potato bites?
-
Herbed sour cream with fresh dill and chives works wonderfully. Garlic aioli, spicy mustard mayo, or a simple herb-infused olive oil also pair nicely. For kids, offer ketchup or mild ranch dressing.
- → Can I freeze uncooked croquettes?
-
Freeze shaped and breaded bunnies on a tray until solid, then transfer to an airtight container. Freeze up to 1 month. Fry from frozen, adding 1-2 minutes to cooking time. No need to thaw first.
