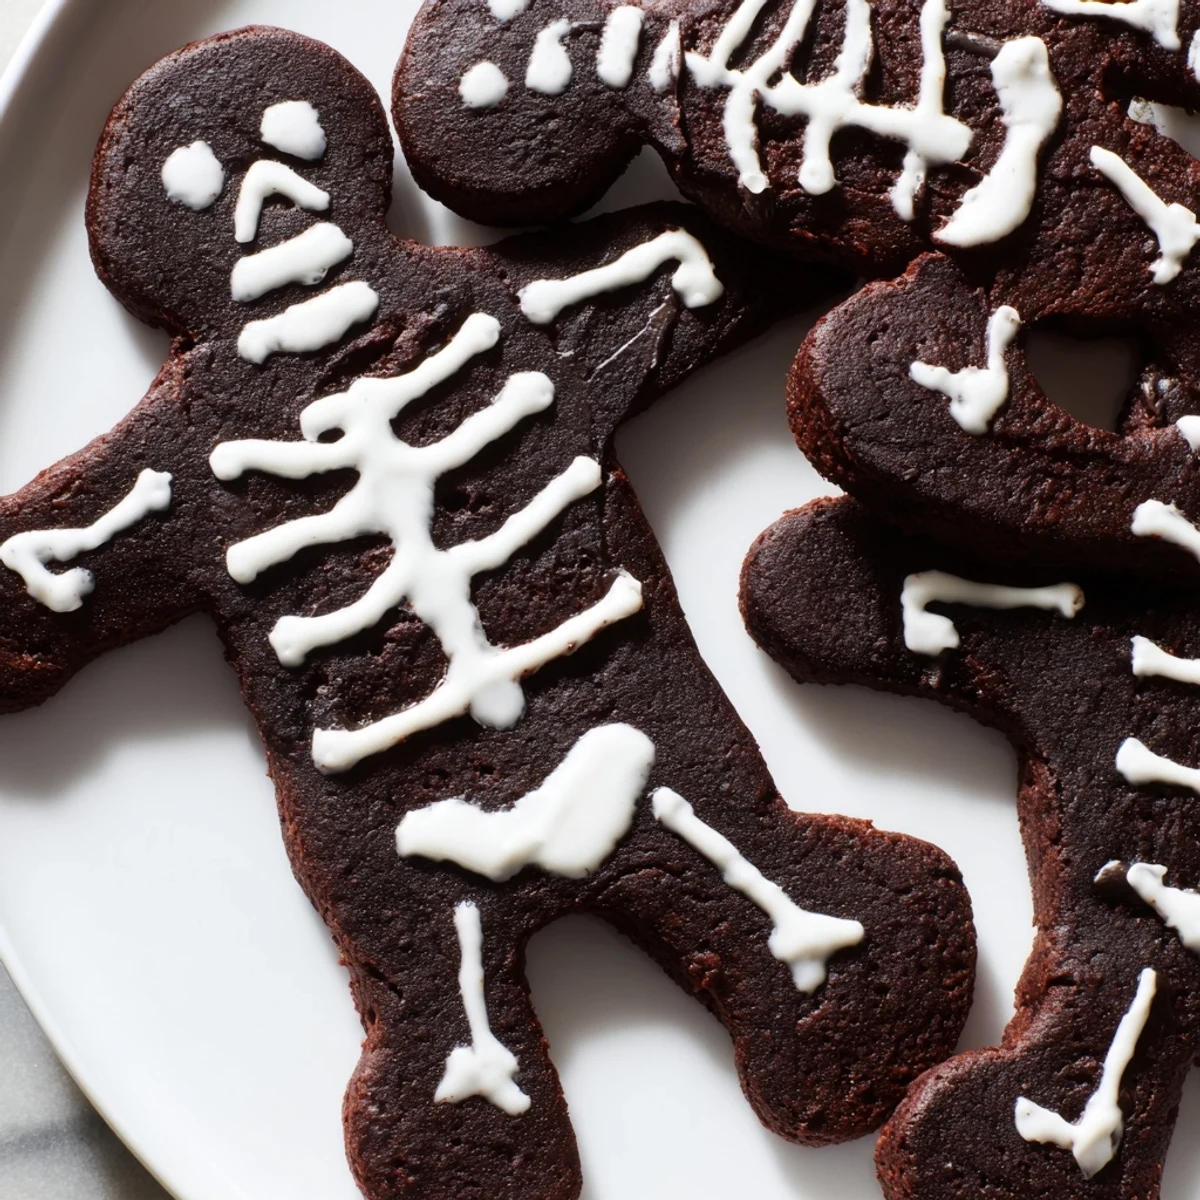
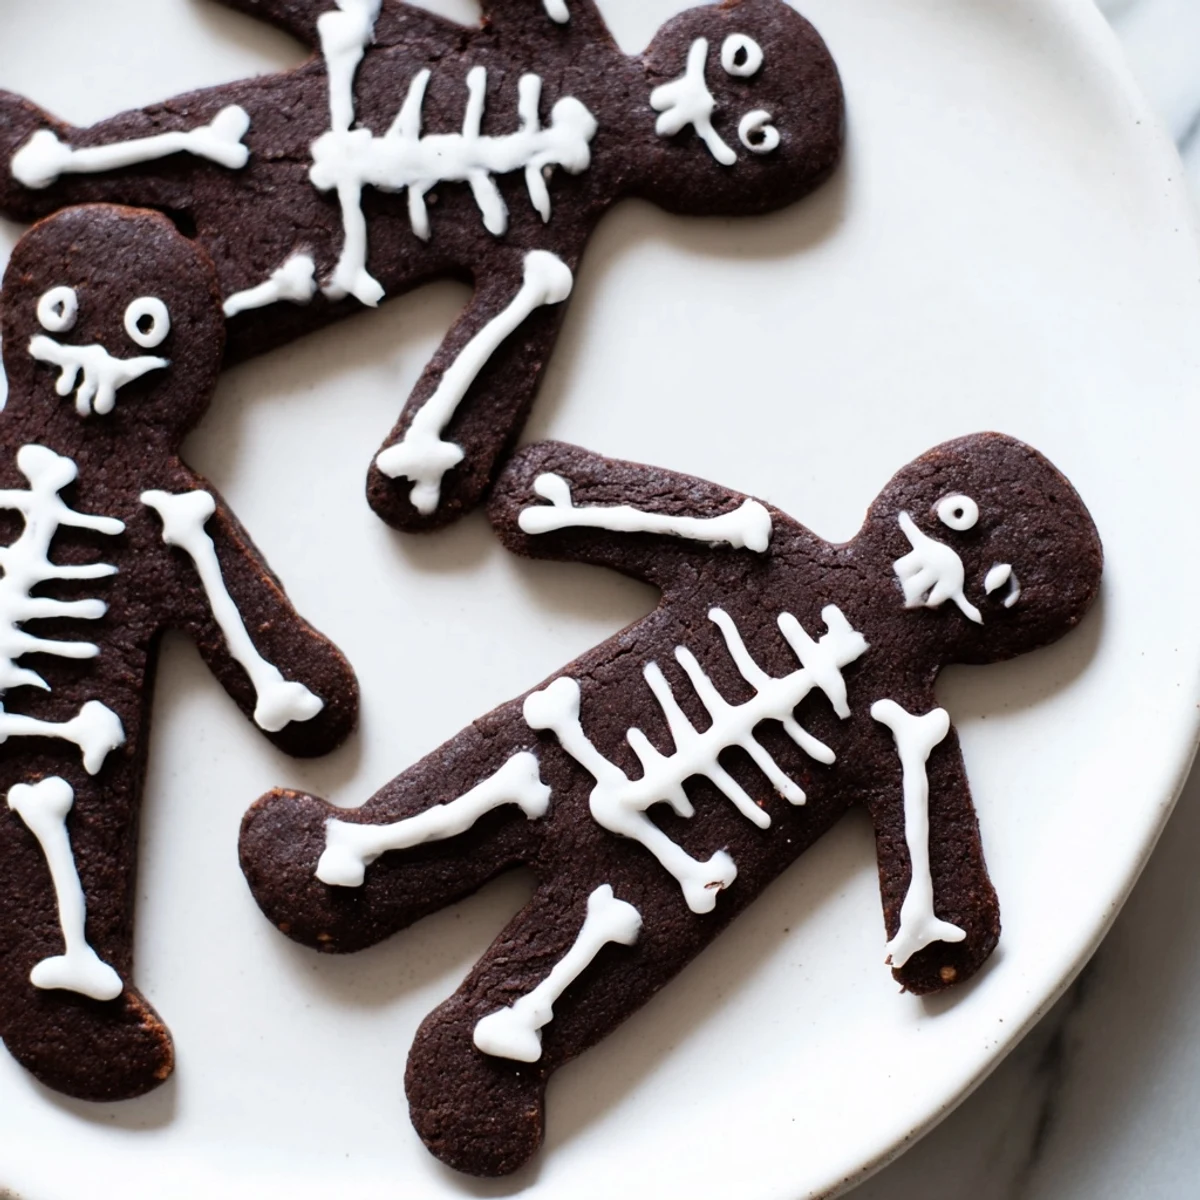
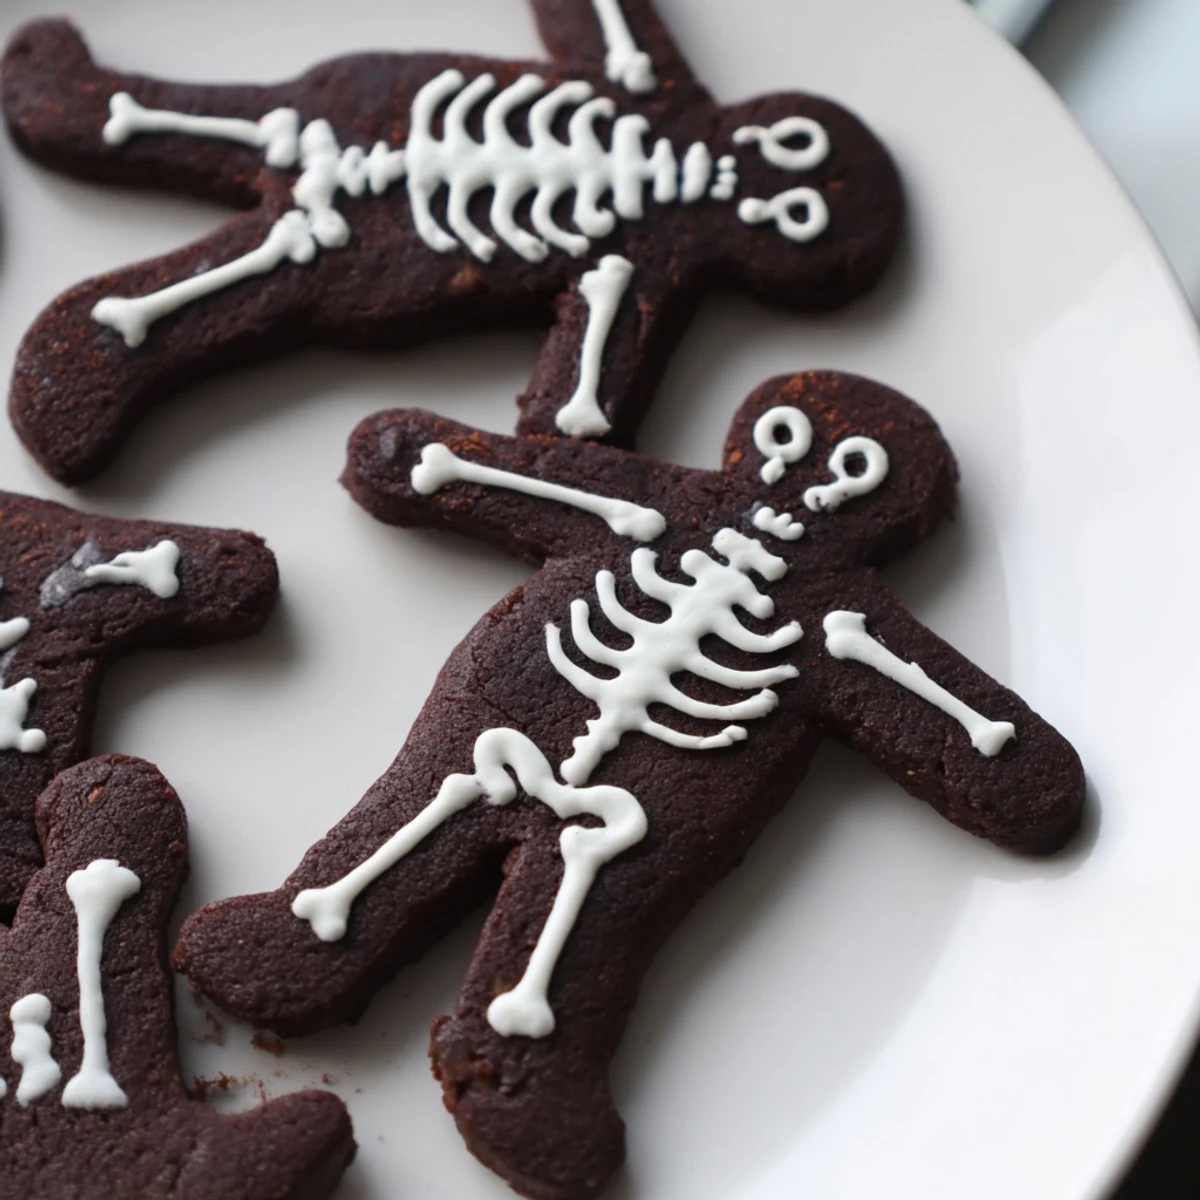
 Pin it
 Create these delightfully spooky chocolate cinnamon skeleton cookies with a rich, tender dough flavored with cocoa powder and warm cinnamon. The dough requires chilling for easy handling, then rolled and cut into skeleton shapes using gingerbread man cutters. After baking to perfection, decorate with homemade royal icing using a piping bag to create skeletal designs. These festive treats capture the spirit of Halloween while delivering irresistible chocolate-cinnamon flavor that both kids and adults will love.
The smell of cinnamon and cocoa hit me before I even opened the oven door, warm and earthy and somehow perfect for October. I'd been invited to a last-minute Halloween potluck and had zero desire to make another batch of pumpkin-spiced anything. These skeleton cookies happened by accident—I couldn't find my regular gingerbread cutters, only a forgotten skeleton mold my aunt had gifted me years ago. Everyone kept asking for the recipe while skeletons decorated plates like tiny chocolatey works of art.
Last year my niece insisted we make a whole skeleton family—mom skeleton, dad skeleton, three tiny baby skeletons. We arranged them on a platter like a family portrait and her dad pretended to be absolutely terrified when we served them. Something about making spooky food brings out everyone's playful side. Now I keep these in my back pocket for any autumn gathering that needs a little whimsy.
Ingredients
- 2 1/4 cups all-purpose flour: The foundation of everything—sift it first if you want extra tender cookies
- 1/2 cup unsweetened cocoa powder: Dutch-processed gives you that deep, dark chocolate color without being bitter
- 2 tsp ground cinnamon: Warm and aromatic—it's what makes these taste like autumn, not just chocolate
- 1/2 tsp baking powder: Gives the cookies just enough lift without spreading too thin
- 1/2 tsp salt: Crucial for balancing the sugar and enhancing the chocolate
- 3/4 cup unsalted butter, room temperature: Soft but not melty—this creates the perfect cookie texture
- 1 cup granulated sugar: Cream this thoroughly with the butter for the best results
- 1 large egg: Bring it to room temperature so it incorporates evenly
- 1 1/2 tsp vanilla extract: Pure vanilla makes a difference you can actually taste
Royal Icing Ingredients
- 2 cups powdered sugar, sifted: Lumps will clog your piping bag—trust me on this one
- 1 large egg white: Fresh eggs work, but meringue powder is safer if you're concerned about raw eggs
- 2-3 tbsp water: Add slowly until you reach the right piping consistency
Instructions
- Whisk the dry ingredients together:
- In a medium bowl, combine flour, cocoa powder, cinnamon, baking powder, and salt until evenly blended—those dark specks of cinnamon should be evenly distributed throughout.
- Cream the butter and sugar:
- Beat butter and sugar in a large bowl until the mixture turns pale and fluffy, about two full minutes—the air you incorporate here makes all the difference.
- Add the egg and vanilla:
- Mix in the egg and vanilla extract until everything comes together in a smooth, glossy batter.
- Combine wet and dry ingredients:
- Gradually add the flour mixture, mixing just until a dough forms—overworking now will make tough cookies later.
- Chill the dough:
- Divide the dough in half, flatten into disks, wrap tightly, and refrigerate for at least 30 minutes—this step isn't optional if you want cutouts that hold their shape.
- Preheat and prepare:
- Heat your oven to 350°F and line baking sheets with parchment paper while the dough chills.
- Roll and cut:
- On a lightly floured surface, roll dough to 1/4 inch thickness and cut out skeleton shapes—re-roll scraps once but no more or the cookies get tough.
- Bake until set:
- Bake for 10 to 12 minutes until the edges are firm and the cookies smell richly of chocolate—let them cool completely on the sheets before decorating.
- Make the royal icing:
- Whisk powdered sugar, egg white, and water until smooth and pipeable—it should flow like honey but hold its shape when piped.
- Decorate your skeletons:
- Transfer icing to a piping bag with a fine tip and draw rib bones, skulls, or whatever spooky designs come to mind—let dry completely before stacking.
 Pin it
 My daughter now requests these for her class Halloween party every single year. Last time I found myself piping tiny skeleton top hats and bow ties at midnight because apparently skeletons need to be fancy for first graders. The best part was seeing how proud the kids were to eat something so carefully decorated, crumbs and icing everywhere.
Getting the Dough Right
I've learned that chocolate cookie dough can be tricky—it's drier than you expect and darker than you're used to. Don't keep adding liquid if it seems crumbly; just keep working it gently with your hands. The warmth from your palms will bring it together perfectly. Over-mixing is the real enemy here, so stop as soon as that dough comes together.
Piping Like a Pro
The first year I made these, my icing was either too runny or rock hard. The sweet spot is when a drizzled line holds its shape for about ten seconds before smoothing into itself. I fill a small glass with warm water and drop my piping tip in between cookies—it keeps everything flowing and prevents those frustrating clogs.
Storage and Timing
These cookies keep beautifully in an airtight container for up to a week, which is fortunate because they're even better after a day or two. I've started making the dough on Sunday and baking fresh batches throughout Halloween week—the house smells amazing and we always have something ready for unexpected visitors.
- Freeze undecorated baked cookies for up to three months and ice them when needed
- Layer decorated cookies between wax paper to prevent the icing from sticking
- Bring cookies to room temperature before serving for the best texture
 Pin it
 There's something deeply satisfying about making food that makes people smile before they even take a bite. These skeleton cookies have become my favorite way to celebrate the season—spooky, sweet, and made with love.
Recipe FAQs
- → Can I make the dough ahead of time?
-
Yes, the dough can be prepared and refrigerated for up to 2 days before baking. Wrap tightly in plastic wrap and let soften slightly at room temperature before rolling.
- → What type of cookie cutter works best?
-
Gingerbread man cutters work perfectly for creating skeleton shapes. Look for cutters around 4-5 inches tall for ideal decorating space and portion size.
- → How should I store the decorated cookies?
-
Store in an airtight container at room temperature for up to one week. Place parchment paper between layers to prevent the royal icing from smudging.
- → Can I freeze the dough or baked cookies?
-
Freeze undecorated baked cookies for up to 3 months, or freeze the dough disks for up to 2 months. Thaw overnight in the refrigerator before decorating or baking.
- → What consistency should the royal icing be?
-
The royal icing should be thick enough to hold its shape when piped but smooth enough to flow easily through a fine tip. Adjust with water one teaspoon at a time to achieve the right consistency.
- → Can I use meringue powder instead of egg white?
-
Yes, substitute 2 tablespoons of meringue powder mixed with 3 tablespoons water for the egg white. This creates a stable icing without using raw egg whites.
